A collection of musings from an simple living, agrarian desiring, craftsman living in the city of Philadelphia.
Saturday, August 28, 2010
Getting a Handle On It: Socket Chisels
Today I decided to get cracking on some handles for a group of socket chisels I've had waiting for me. On the top, left to right is a 2 inch Buck Brothers BEC, a 1 1/2 inch Buck Brothers BEC, then three Stanlet No. 750s in 3/4, 1/2 and 1/4 inches. The 1/4 is horrifically abused, a long 15ish degree primary bevel? WTF is that? I may grind it back to remove this mark which will leave me about 2 inches of usable blade or try to find more 750s for the set. I'm going antiquing tomorrow so I'll wait to handle that and see what turns up. Below those are two that I handled earlier, a long 5/8 inch Craftsman paring chisel with some chips, and an unmarked 3/4 inch former.
The handle stock is a bunch of blanks cut from a maple science lab table that found its way into our school shop, pretty grimy and wild I wasn't going to use this for anything else. Blanks were cut months ago when I found the wood. I have two stiles, longer and skinny and shorter and thicker. Using this v-block hook, I cut a rough tapered octagon on the blanks.
I don't care if it's not perfectly symmetrical, as long as it has 8 sides it will be comfy and work.
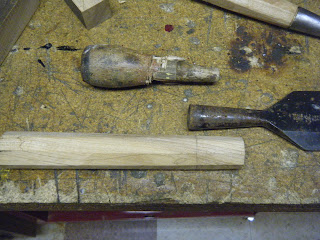
The first buck I get to cheat on, it still had a "handle" on it, I took most of the tenon measurements from it. You need the depth (measure with a drill bit), the large diameter (outside calipers), and the small diameter (drill bit again, or guess and check). I use outside calipers because it's faster than using inside and transferring them to outside and I have to fit the tenon to the socket anyway, make it a touch oversize and you'll be golden.
Now the easy part, strike a baseline for your shoulder and cut the major and minor diameter, bam you have a tapered socket. I've done these on the lathe, and by hand. The lathework is simple spindle turning two your two diameter measurements, followed by a skew to fair the transition. By hand I like to saw the large diameter depth all the way around then chisel and file the taper. Either way will get you there, what you're looking for is something that mostly fits the socket of your chisel like so...
As you can see there is a bit of a gap, this means the socket hasn't bottomed out yet. This could be from any number of things, irregular side walls on your socket, irregular tenon. a too-fat portion etc. Fortunately they are all easy to fix, mark a spot on your handle so you know where it will orient to the blade, and lightly tap it down. Then pull the tenon off, if your chisel is older there will be enough dust/rust/grime to mark the tenons interference spots, if you're doing this with brand new chisels or they are too clean, wipe some soot in the socket and try again.
Here you can see some light spots indicating where to take off material, lather, rinse, repeat until a little gap remains. Then hold the chisel by the steel and slam it butt down into a stump or other mass until it seats fully, have a little gap so that the tenon can compress and move into the socket a little more.
The end product. The only thing left to do is to trim the taper so that it blends into the taper of the ferrule. Then bevel the end (if you don't plan on hitting it with something) or cut a tenon for a hoop and fit the hoop (for say bih heavy duty whackers).
After all was said and done I scraped the handles with a shard of glass and wiped on some mineral oil. They look amazing and rustic and I can't wait to do more.
Subscribe to:
Post Comments (Atom)


No comments:
Post a Comment