Pages

Saturday, July 30, 2011

Blanket Chest: Ready for Finish

I've started finishing the blanket chest lid, mostly because I couldn't wait, but my girlfriend got really excited about the project and want's to help. I'm very excited about that.

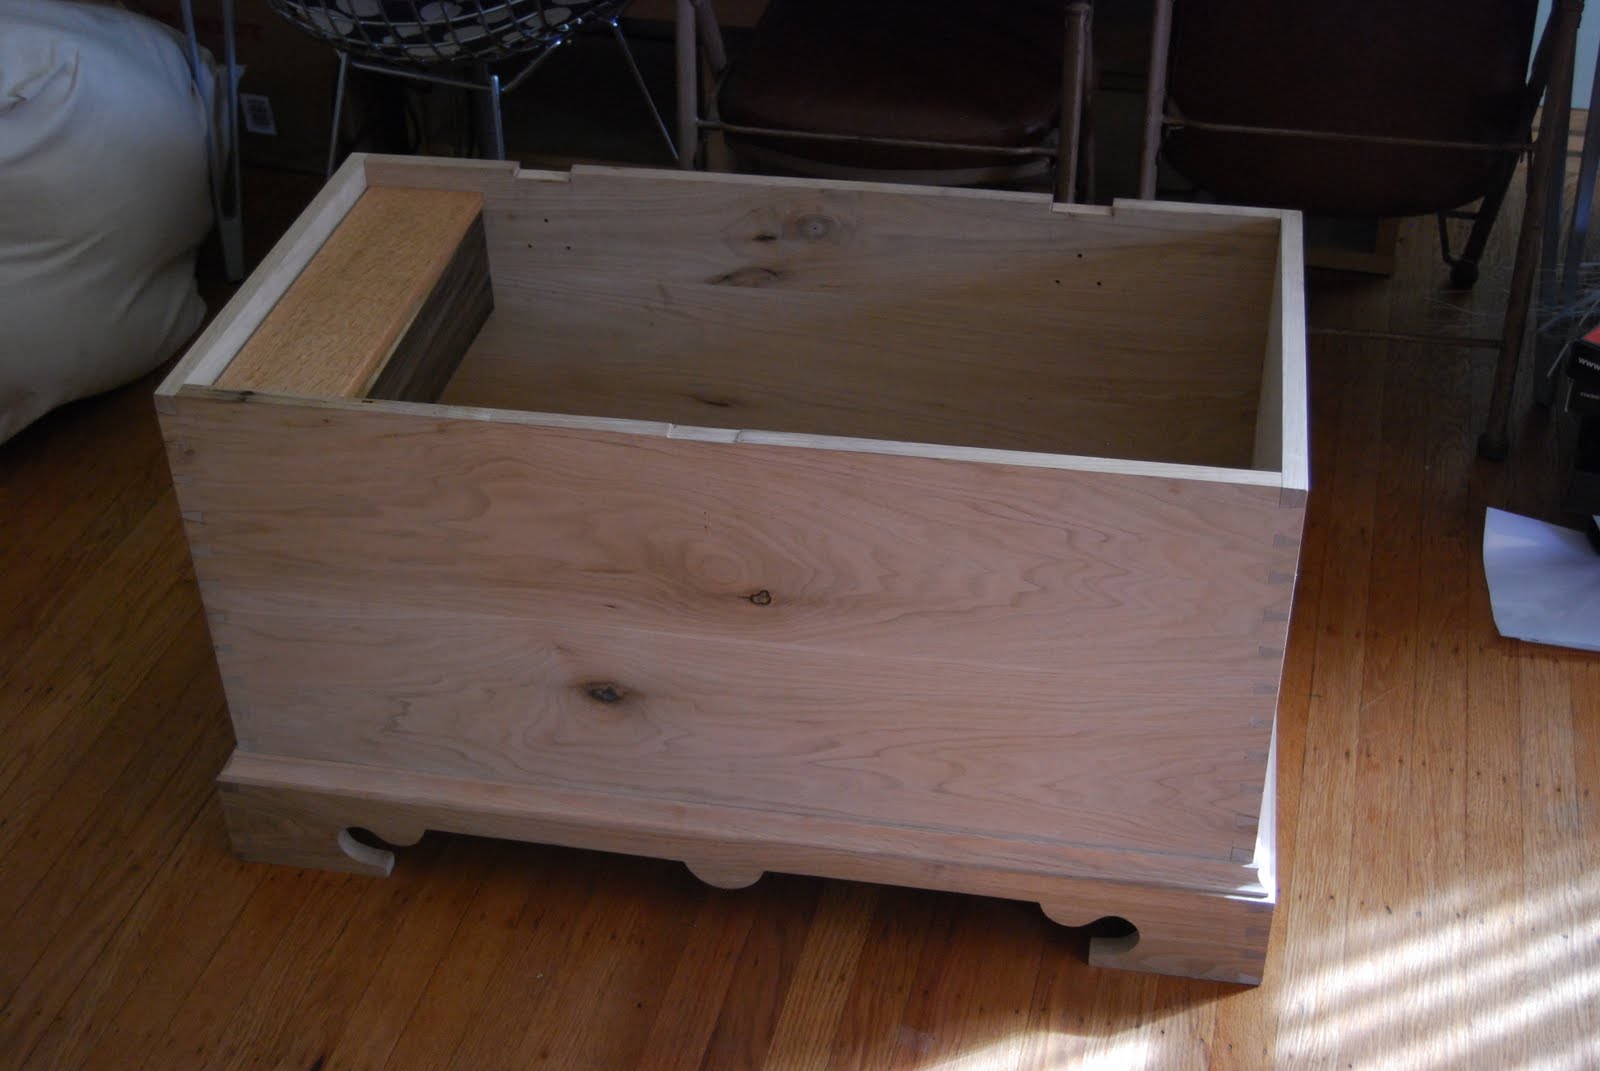
So here are the early morning photos of the finished, albeit lidless blanket chest. By the way, the lid looks fantastic with three coats of shellac and wax.


Thursday, July 28, 2011

Tuesday, July 26, 2011

Blanket Chest Class

Dovetails, a lot of dovetails. That's one sentence to describe the class at the Philadelphia Furniture Workshop I started on Monday. They call it "a dovetails tour de force" with 80 inches of dovetails in the whole project. The chest itself is beautiful, the primary wood is butternut, which saws and chisels amazingly. The moulding and breadboard end are of quartersawn red oak which, I'm told, will age well with the butternut. My practice dovetails were great, and I'm very happy with my progress thus far.

These first few photos are of the practice piece, it's only about 9 inches long, and has 4.5 tails...that's only half of one side.

Look at those tails, we are taught to scribe heave baselines. This makes it easy to "flick" away material to create a shelf of sorts to pare from. It makes a great difference on the show side I feel.

My fret saw usually starts leaving a lot of waste on the left side of the board towards the end when I'm in a good groove I have this little bit left. If I can get to this consistently, I'll have alot less paring to do.


This is the end of the first days work, all parts cut to length, practice DT's cut, all tools sharp, tails cut on the back and tails laid out and sawn on the front board.

I got to work quickly this morning, getting the first side pared and test fit. It's great! by the end of today I had the back and sides fit, all I have to do is cut pins on the sides for the front and I have a case! I'm very excited.

Saturday, July 23, 2011

American Trestle Picnic Table

My parent's commissioned a picnic table, mostly because I refused to let my mother by one of the heinous pieces of garbage Home Depot thought was a picnic table. It had those stamped metal framing plates for rafters, and hinges for christ's sake. I told them I'd build one, and set out to find a design. That was when I found Schwarz's table and loved it. The top will be a more utilitarian three board affair out of fir.


Friday, July 22, 2011

T.H. Witherby Restoration

Restoring a tool to it's former glory is a very rewarding thing for me. It's better than building a new project, better than showering. Heck it's even better than scoring a crispy #9, NIB for $2 from the rust hunt. Well maybe not on the last one, I'd love that too.

But still, I love restoring a tool, it's the matter of taking something perhaps missing a handle or deemed mostly unusable by most people (even better if everyone says "What the hell is that?") and returning it's dignity by cleaning it up, getting it's parts back together and letting it serve the job it once performed. Objects have a soul in this way, call me crazy, but I think they look happy, after being pressed back into service.

All this started after some time on the lathe creating a beech handle for a 1" TH Witherby bevel edge firmer chisel. The overall length is 13.5 inches.

Tuesday, July 19, 2011

Key Cabinet: Frame & Panel Back

Today was a great milestone, the back of the cabinet is finally finished! I brought the gorgeous Sitka Spruce stock I'd milled for the frame, which will be bridal jointed. This spruce was graciously donated and comes with an inspiring pedigree. It was hand bucked from fallen trees, split and carried out of Alaska on foot. It truly is amazing stuff to work, planed surfaces glimmer. The panel is a piece of 4mm PlyBoo, which was a bear to work, even a finely set plane tore out huge slivers, only a cabinet scraper could tame the piece and get it to size, the back is beveled to fit a one-eighth groove. for scale, the bottom rail is 3" wide.


The panel is pre-finished with two coats of clear lacquer and wax. I'm not sure what the rest is going to be, perhaps a homebrew oil/wax type finsh. I want something that looks inviting to the touch, and not too glossy, yet something that will dance light around on the inside. Now I have to start on the door, walnut and glass maybe a spruce muntin or two?

Thursday, July 7, 2011

Dovetail Marker Pcitures

As promised more pictures. I did some metal stock research and found a great source for some brass bar. I've prototyped version two in wood and I'm liking them a lot.


Wednesday, July 6, 2011

Dovetail Marking Gauges

Today I built something I always wanted, a dedicated dovetail marker. This was spurned by some boredom and the (re)finding of some bits of brass bar I'd milled square way back when I had a small milling machine. I debated about practicing peined double dovetails, but didn't exactly have the right stock for it. If there was some steel plate around, I would have loved the look of those.

I've got two markers, one is a 1:7 and 2:9ish with cocobolo, and a square and 1:7 marker with ebony. The blades are all 1/8" inch brass and are capable of laying out DTs on 1" stock. Now for the sexyness. I didn't get a good picture of the finished markers, so I'll post them tomorrow when I can shoot them in the sun.


I can't wait to bring them to the Blanket Chest class at the Philadelphia Furniture Workshop in a couple of weeks. I'm intending to do a production run of these, so if you're interested leave a comment with a slope you think should be produced. I favor the square/slope version.