Pages

Friday, April 30, 2010

New tools in progress

I was reading the Cornish Workshop post about a gunstock scraper. I'm intrigued. They seem like really handy tools, use small bits of wood and add to the tool collection. All good things right? Here is a piece of Cocobolo with some old Craftsman sawblade cut. We have a metal shear in out school shop which makes breaking down old saw blades easy as all get out. I also want to gloat (sorry) about some free cherry I got from a guy in my furniture design class. He had scrap and didn't know what to do with it (he's not a material hoard or fanatic wood guy like me) so he gave me a bunch. There's a nicely figured piece in the back about 8 inches wide and 3/4 thick 36" long the others are 5/4 and range in size about four or five board feet. I'm going to remake my marking gauge, the fit is a little sloppy, make a cutting gauge, a M&T gauge, and a panel gauge. I should be all gauged out by then.

Tuesday, April 27, 2010

Fin

The chair, finally finished I carried it around my studio, getting about 50 different people/professors to sit in it. Lot's of people are excited that something like this came out of our studio. I'm certainly happy with it.

The Final Push

Cutting the kerfs to chisel out the waste for the back rails. Lots of little cuts, my Marples Japanese saw It's one of my favorite tools.

Paring out the waste.

The finished chair, all backslats installed and seat glued and pinned in place.

Here I am starting my finish, an "ebonizing technique" handed down by my furniture design professor, black shoe polish and paste wax. It doesn't look like an actual ebonized finish. If it didn't look so antique I would hate it, but I like how it turned out.

Ladderback Progress

Here I am gluing up the rear legs, they are laminated out of 7 5/16th slices ripped on the tablesaw. Man do I love those giant C-clamps. I let each leg cure for 2 hours before pulling them out and jointing the edges.

Now I'm surfacing the apron pieces, I just love the bench hook, one of my favorite tools. As you can see I'm a member of the "planes on their side" club.

All the pieces cut and ready for drilling, in the interest of time for this Furniture Design class I'm going to dowel the parts together. My next will be m&t (mortise and tenon, jeff).

The glue up, pretty painless, I'm a bit surprised.

Saturday, April 24, 2010

A visit to Woodcraft


Today I took a trip to Woodcraft with my boss, to pick up a sweet bandsaw 14" throat with a 13" resaw capacity...I want one. $800 is out of my budget and too big for what shop I have left. When I move out and need a shop of my own though... Anyways I picked up a spokeshave which I need to work on my chair. I also looked at the Lee Valley Low-Angle Spokeshave, which is a cool tool. I'm also really into the "Contour Planes" I might make a set.

East Indian Rosewood was on sale so I picked up a block, and Hormigo Negro had some really beautiful colors and grain so I got some of that too.

Sunday, April 18, 2010

Ladderback Chair

This is the first, fir, mock-up of a chair I've designed for the furniture design class I'm taking this semester. It was tested with the whole class about comfort issues, seat depth, height and other critical "comfort" measurements. Things are changing based on those comments, I'm ditching the shaped lower stretcher (in chipboard) the seatpan has to tilt backwards, and move forewards. the rear legs will splay backwards, the back will raise to 40 inches, there will be three backslats. Here is the 8' piece of 6/4 Oak I'm going to break down for bend-laminating the back legs and making the other parts. And here is my favorite part so far, the raw seatpan lamination. I used generously donated 1/8" plywood (birch veneer balsa core?) it was screwed against a one part 2x4 mould (with exactly 102 1 1/4" drywall screws) I still have to Bondo and veneer the lamination with Oak (also donated). I'll post pictures of the mould and process in a separate section when I process the second seatpan.

Rehabbing a Smoother

Yes the background of this photo has the blog post window that I'm actually writing for this post, it's like breaking-news, about a piece of wood.
So I picked up two Sandusky #3 smoothers from an OldTools list member. One had some bad checking, but has a great iron for some plane I'll make, the other has a big mouth, too big to take nice shavings. I drilled and chiseled out the waste to fit a maple scrap, planed flat and filed the mouth 'till a sliver was opened the full width. I still have to finish sharpening the iron, maybe fettle some then see how she cuts. The mouth may need more work after all that.
Here's a shot of the patch on the mouth, it's a little gappy around the front.
Here's an overhead of my sharpening jigs and the smoother iron plus the little #9 1/2 (adjustable mouth block plane, jeff).

Saturday, April 17, 2010

Plane Haul

Today I took a drive with my room mate to a flea market by his house. When we got there it was the emptiest I'd ever seen it. It had rained a little before we left so many of the vendors weren't there yet. We were a little hesitant, was there going to be anything awesome here this early and sparse? The answer was yes!

On the second table we walked past there was a woodie jack in nearly mint condition. No checks, no cracks, sole has a little wind in it, but other than that it's perfect. Cost $12, I couldn't not, if you know what I mean? I picked up a countersink for my brace, and a giant 18" no tang wood rasp for $2 to forge into a drawknife, adze, axe, and maybe a slick. I should have bought more giant files. And an carbon table saw blade for another $1.Then it happened, I found the plane I'd been searching for for weeks, eBay had been pricey... First thinks I saw on his table were some moulding planes in great condition. I didn't "need" any of them and I didn't have a ton of money on me, I moved down the line. He had a row, and I mean 7 or 8 #4's (smoother, jeff) and some blocks. just peeking out the back of the smoothers was the telltale brass knob and stamped steel adjuster. I acted coy I didn't want to go all bug eyed right in front of him. After picking up a smoother or two and fiddling with them I picked up the adjustable mouth block, I wasn't putting it down. everything looked good, and the action was nice and tight. the tag said $18, cheaper than shipping on eBay, but before I could haggle the guy said he'll take 10. I've never met a guy to haggle his own prices down, but I took him on it and walked away with a big dumb grin on my face.

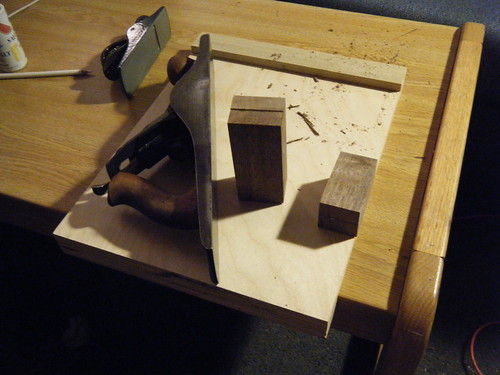
Here are some more shots, it's a bevel up, blade width 1 5/8, a left-hand depth adjusting screw, brass/plated knobs, finger depressions on the sides, and a later-style lever cap. I think these indicate a post 1908 #9 1/2 but can anyone confirm this? It's only marking is STANLY on the toe.

Wednesday, April 7, 2010

Mini Planes in Walnut

Hey all,

So after reading The Woodshop Bug and The Village Carpenter's mini woodie pages I decided to put some scrap walnut to work as mini planes of my own. I'm using 1/8th thick 1095 for the blades. Those are my two blanks one 1.6"h x 1.5"w x 3"l the other is 2"h x 1.5"w x 4.5"l. soles flattened with my $.99 eBay #5 (thats a Jack, Jeff). Note that I'm also showing off my bench hook, made of Birch plywood scraps from our shop and some poplar. More progress as I get there.