I had, had to share this. It's too funny.
Saturday, November 5, 2011


Friday, November 4, 2011
Wooden Planemaking
An old illness has burned back with a fury. Planemaking. It's here to stay too. I've ordered a scarce copy of Whelan's The Wooden Plane: Its History, Form and Function and got a copy from New York on inter-library loan, because I was too impatient to wait. Between working on the bed I've taken moments to begin work on a miniature rabbet plane.

After final trimming it will hardly be 5 1/2" long. It will be 3/8" wide.
 It's made of beech and boxed in Brazilian Cherry (at least that's what the scrap piece I had was supposed to be. Janka says it's very hard around 3000 if I remember correctly. Boxwood comes in at around 2900 so I think this will work, assuming it's stable enough to use. I can't wait to trim to fit.

After final trimming it will hardly be 5 1/2" long. It will be 3/8" wide.
 It's made of beech and boxed in Brazilian Cherry (at least that's what the scrap piece I had was supposed to be. Janka says it's very hard around 3000 if I remember correctly. Boxwood comes in at around 2900 so I think this will work, assuming it's stable enough to use. I can't wait to trim to fit.
Sunday, October 30, 2011
Bed Project: Footboard
Here's the completed footboard, it still needs come shellac, but it's otherwise good to go. These are my first drawbored joints, even with a crazy slightly misaligned offset on the one side the pegs drove all the way in. These joints are tight, I'm a huge fan of this.

 I'm also very pleased with the color.

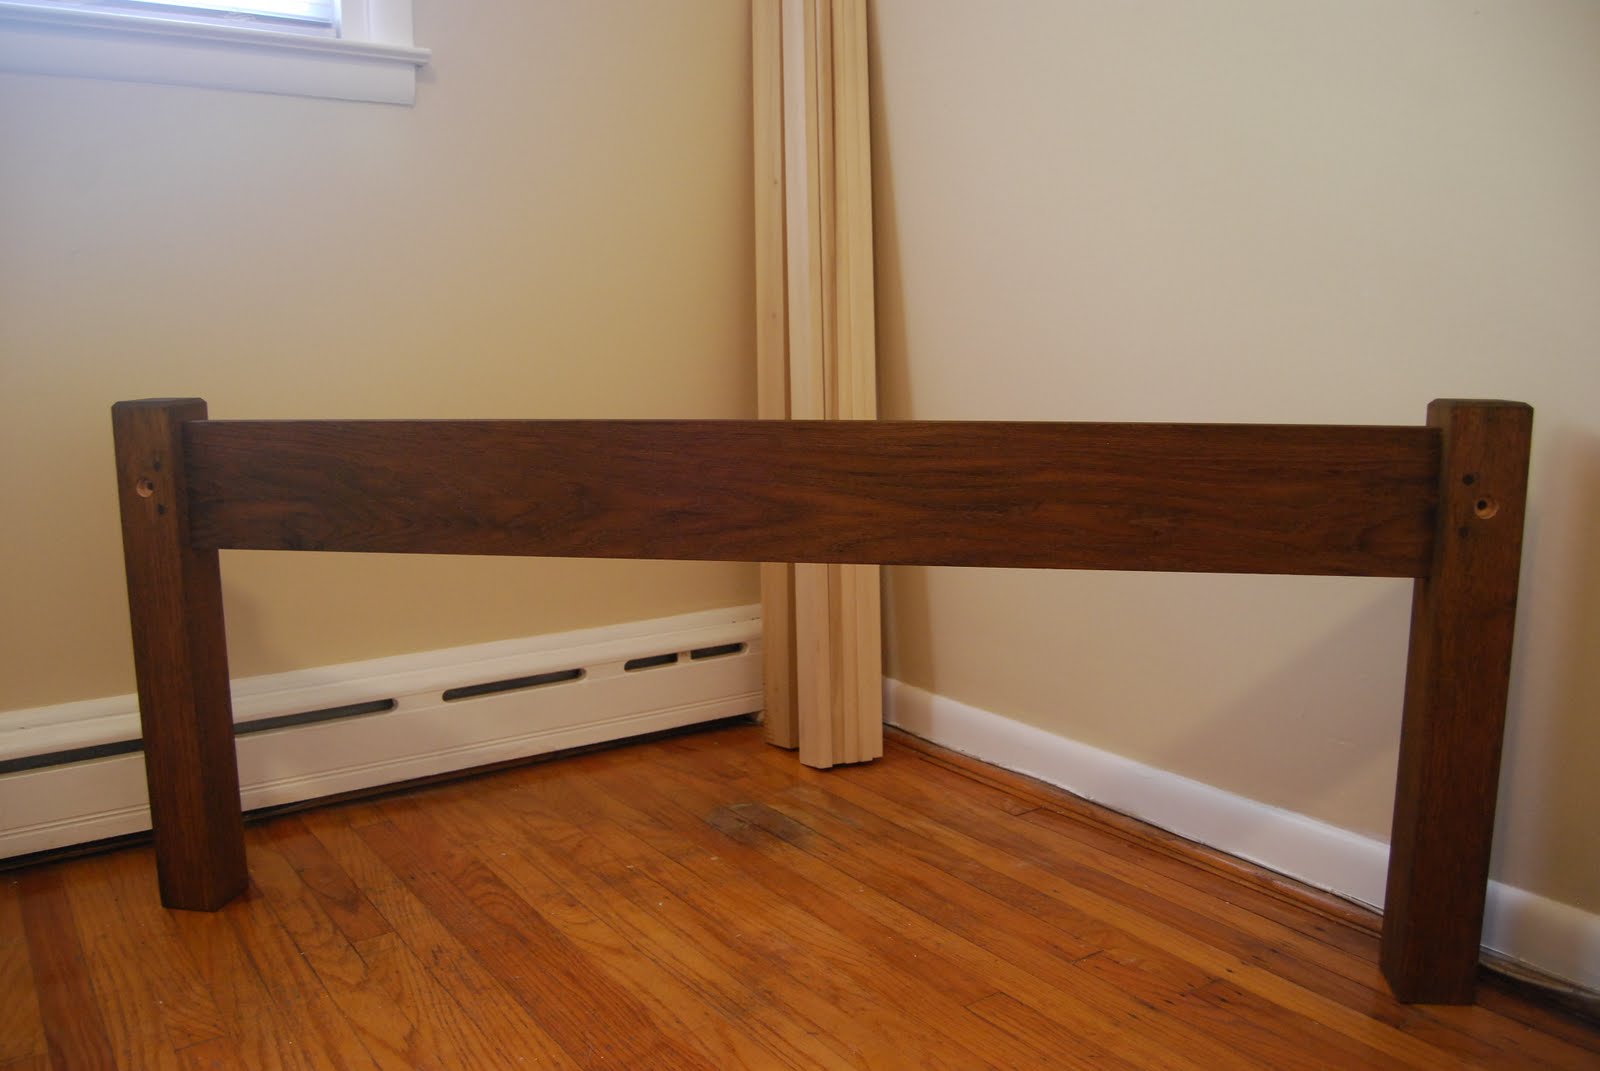 I'm also very pleased with the color.
Saturday, October 29, 2011
Staining with WD Lockwood Dyes
The bed that I'm working on needs to look older. A few coats of shellac and a waxing wasn't going to cut it on this project. I also didn't want to get into the smelly gel stains and varnish combinations that look really awesome on oak, seeing as I'm locked in the apartment with this stuff now that the weather is cold.
While milling the lumber I spoke with a guy by the name of Les Katz, who is a really imaginative woodworker, and he suggested water based dyes. Some of the reasons for were inexpense, ease of use, water based, available in a wide array of colors, and the ability to layer and mix them for really cool coloring effects. I got on the phone with Lockwood and placed an order, which shipped and arrived Monday by the way.
Here's what I came up with...


Here are the two short legs, one is finished with the dye the other only has the base coat of yellow.

While milling the lumber I spoke with a guy by the name of Les Katz, who is a really imaginative woodworker, and he suggested water based dyes. Some of the reasons for were inexpense, ease of use, water based, available in a wide array of colors, and the ability to layer and mix them for really cool coloring effects. I got on the phone with Lockwood and placed an order, which shipped and arrived Monday by the way.
Here's what I came up with...


Here are the two short legs, one is finished with the dye the other only has the base coat of yellow.

Friday, October 28, 2011
Pembroke Table-Leaf Support Aprons
Here follows the next phase of the Pembroke Table class at the Philadelphia Furniture Workshop. It's been a long 7 weeks so far, I'm itching to get this thing home, but really enjoyable. I get to leave a day of teaching to practice the craft and get taught myself. It's a nice change of pace, not being the one everyone looks to for an answer like my day job can be.

Fairing out the curves on the leaf support with a rasp, a card scraper followed and removed the tool marks.

Alan's fixture for sanding the finger pulls, I think it would have been fun(er) to carve them with a gouge, but I've been catching enough hand-tool flack from some of the class that I'll make this exception.

I forget what I was telling Mario at this point, but I'm sure it was really important.

Aside from being a cool shot of hands, this is an important step for me. I'm going to cut the dadoes by hand, in this step I'm measuring the range of motion the corner of the leaf moves about. This is so I can make the dado deep enough so as not to bind.

Cutting the dado sidewalls with a gorgeous old backsaw.

What a nice reveal? The three knuckle hinge board is not the right one though, the grain doesn't match.

Well it opens, and it stops at 90 degrees to the apron. How sexy is that?

Action planing.

I'm sighting down the apron to see if the leaf support sticks out proud of the sides, it does a little bit, I think the inside of the hinge needs to be relieved a plane stroke or two.

The finished sides awaiting the next step. That's the wonderful #604C with a Hock iron I used to do my smoothing. I love this plane, it's fantastic.
 Yeah, I got oak. What's it to you? This board has some of the last pieces I need for the bed build. I did some color sampling today, I'll post tomorrow about that, glorious fun those W.D. Lockwood dyes.

Fairing out the curves on the leaf support with a rasp, a card scraper followed and removed the tool marks.

Alan's fixture for sanding the finger pulls, I think it would have been fun(er) to carve them with a gouge, but I've been catching enough hand-tool flack from some of the class that I'll make this exception.

I forget what I was telling Mario at this point, but I'm sure it was really important.

Aside from being a cool shot of hands, this is an important step for me. I'm going to cut the dadoes by hand, in this step I'm measuring the range of motion the corner of the leaf moves about. This is so I can make the dado deep enough so as not to bind.

Cutting the dado sidewalls with a gorgeous old backsaw.

What a nice reveal? The three knuckle hinge board is not the right one though, the grain doesn't match.

Well it opens, and it stops at 90 degrees to the apron. How sexy is that?

Action planing.

I'm sighting down the apron to see if the leaf support sticks out proud of the sides, it does a little bit, I think the inside of the hinge needs to be relieved a plane stroke or two.

The finished sides awaiting the next step. That's the wonderful #604C with a Hock iron I used to do my smoothing. I love this plane, it's fantastic.
 Yeah, I got oak. What's it to you? This board has some of the last pieces I need for the bed build. I did some color sampling today, I'll post tomorrow about that, glorious fun those W.D. Lockwood dyes.
Saturday, October 22, 2011
Building More of a Bed

Here's where my day started, I've got a test tenon here to layout the knockdown fasteners and check how the riven pins fit the bit I'm intending to bore.
 If I was an "ar-tiste" I'd call this Transformation of a Riven Peg. I'm not, so this is the steps in making really strong pegs for drawboring. On an artsy note I really like how the Swiss Army Knife came out it's color and wear.
View of the cramped quarters occupied by the knockdowns.
 And the plate used to rive the pegstock. it's a piece of 5/16 mild steel with a 3/16" 1/4" 5/16" 3/8" and 7/16" diameter holes. It can't be hardened, because it's mild steel (insert drivel about chemistry) but that's no matter. It's attached to a chunk of D.Fir 4x4 with 5/8 holes bored under the cutting holes.
  A mockup of the bed, I've still got work to do before I drawbore the short sides together, namely breaking the edges, smoothing and dying the parts.
 All packed up and ready to take home. Good thing this project is almost over, I've been tiring of carrying one stick of lumber into and out of my apartment for the last few weekends. After moving the lumber for the workbench two or three more times I'll be ecstatic to work on smaller items like the molding planes and kumiko.
Wednesday, October 19, 2011
Building a Bed
Sleeping on a futon is an excellent motivator for building a bed, doubly so when your girlfriend keeps asking when the bed will be finished, triply so when you have a pile of wood begging to become a workbench.
So here's the progress.


Here you can see some of the marks telling me where different depth morti go and which faces are the show faces.
The Veritas knockdown fasteners I ordered came today, along with some other goodies you'll learn about soon.
So here's the progress.


Here you can see some of the marks telling me where different depth morti go and which faces are the show faces.
The Veritas knockdown fasteners I ordered came today, along with some other goodies you'll learn about soon.
Subscribe to:
Posts (Atom)